Raspberry Pi image with TRIGGERcmd pre-loaded
-
This Raspberry Pi image (updated 2/11/25) has the following features, but you don't have to use all of them:
- Home Assistent direct support. No need for Internet - the agent talks to HA over the LAN if you configure it to.
- When the Pi boots, it will audibly tell you the pair code if you plug in headphones to the Pi's headphone jack.
- Just plug it into your ethernet, boot the Pi, and listen for the code,
- Log into your account, click your name, click Pair, then type the pair code.

- This avoids having to connect a monitor or ssh in, to read /root/paircode.
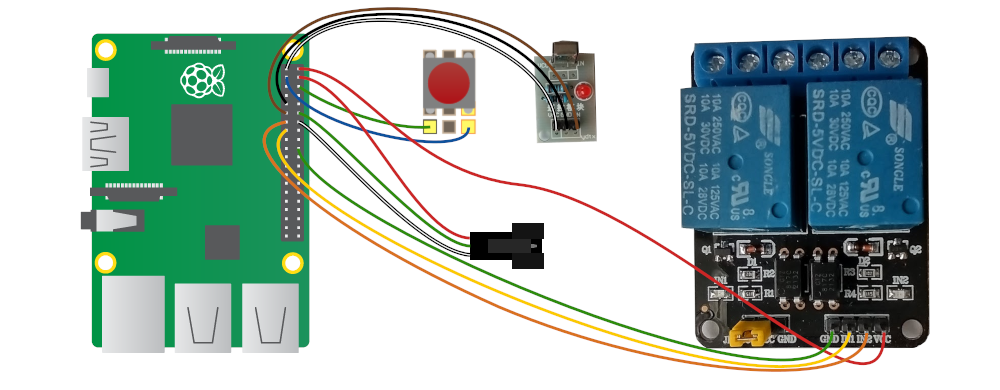
- Creates a panel in your account called "IR Remote" that you can control using an infrared remote control.
- Unlike the Orange Pi Zero 2 in this article, you'll need to plug in the IR receiver that comes with the IR remote.
- You can also use the Blue Dot app via Bluetooth. The image includes a command called Pair Bluetooth that will give you 1 minute to pair your cell phone.
- You associate each panel button with a command, then you can run those commands using the physical infrared remote control buttons.
- Creates a "Configure Wireless" command to configure a series of wifi networks in priority order. You run the command with the Parameters button and specify your wifi network SSID's and passwords like this: network1,password1,network2,password2,network3,password3
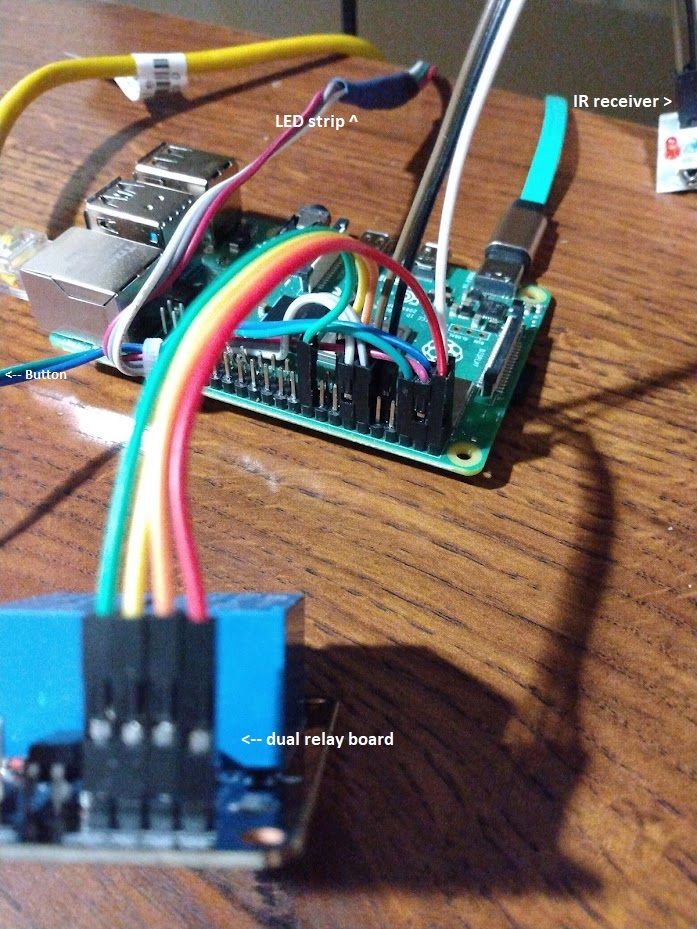
- Creates two "Garage Door" commands to control two relays you can connect to the Raspberry Pi.
- Creates commands to control a colored LED strip like in this bike project.
- You can plug in a physical button to toggle the LED strip on or off.
- During boot the LED's will turn:
- Red to indicate the Raspberry Pi is booted.
- Blue to indicate it has Internet access.
- Green to indicate it is talking to the TRIGGERcmd API (after you pair it with your account).
It should show up on your LAN as triggercmd-rpi.
The default password for the "pi" user is "triggercmd" but you should change it.


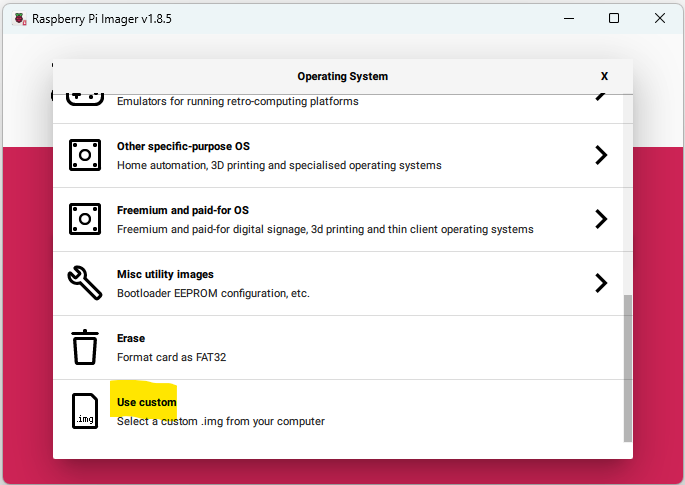
You can use the official Raspberry Pi Imager to write this image to your MicroSD card. Just select "Use custom" and select the image file:

LED strip:
https://www.amazon.com/gp/product/B0888HYCJNDual relay board:
https://www.amazon.com/SunFounder-Channel-Optocoupler-Expansion-Raspberry/dp/B00E0NTPP4IR Receiver:
https://www.amazon.com/VS1838B-Universal-Infrared-Receiver-Starter/dp/B087ZRD3LHIR Remote Control with IR Receiver and wires:
https://www.amazon.com/Infrared-Control-Receiver-Raspberry-arduino/dp/B0981DBCY9
-
 R Russ pinned this topic on
-
 R Russ referenced this topic on
-
 R Russ referenced this topic on
-
 R Russ referenced this topic on